
IT’S FINALLY HERE! My everyday hair tutorial has been the most requested post topic (by a landslide) for the last few years. I’m working on finding a videographer to film and edit a video version for you, but I recently snapped a bunch of photos for an easy-to-follow step-by-step guide in the meantime! Product and tool recommendations, too. Let’s get started…

Round Brush | Leave-In Conditioner | Styling Creme | Blowout Balm | Comb | Blow Dryer
I keep it pretty simple, honestly! Most days, I try to let my hair air dry as much as possible to minimize heat damage. To get a smoother/sleeker look, I’ll blast with a blow dryer and a round brush for a few minutes once it’s almost dry. If I don’t have time to air dry or I’m going for an at-home blowout, I blow it all the way dry right after I apply my wet products.
When I first get out of the shower, I drench my strands with Unite 7 Seconds Leave-In Conditioner and comb it through with a plastic wide-tooth comb. Then, I apply my styling cream of choice before blowing it out! Lately, I’ve been loving R + Co Park Avenue Blowout Balm and Jackpot Styling Creme.

If I’m fully blow-drying my hair, I mostly rough-dry it with my fingers. When it’s almost dry, I’ll grab a round brush to make sure it’s a bit more smooth.
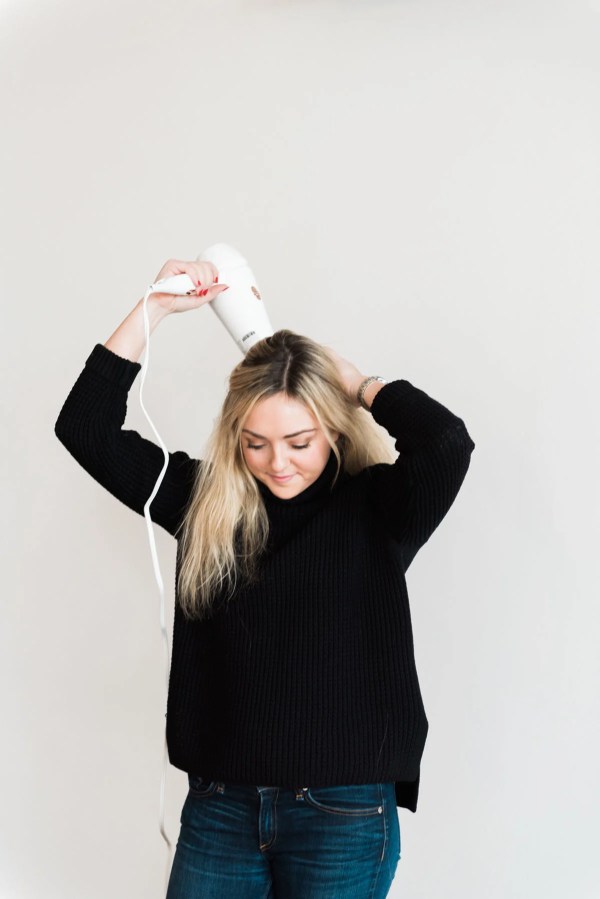

A few years ago I finally invested in a high-powered blowdryer and it was the best. investment. ever! I used this Amika Blow Dryer for three years, but recently got this T3 Dryer after dropping my old one approximately 400 different times. It was starting to look a little too banged up, and I couldn’t resist this shiny white one with rose gold accents.


And here’s what I use during and after curling!
Curling Wand | Dry Texture Spray | Hairspray | Dry Shampoo Spray | Moisture Cream
I’ve had this Jose Eber Curling Wand since 2011. (Actually, this is the second one I’ve had because Grace somehow broke the power button on my first one when we were in Hilton Head a few years ago. We’re still not sure how that happened… 😂) I have the trio version, but I only use the biggest barrel so you could just get this one!
I spray texture spray all over my hair before I curl it, especially after a wash. My curls definitely do not last as long if I skip the texture spray beforehand! It helps to give your hair a little grip when it’s super soft and not that dirty. I love the smell of Oribe’s version and I’ve been using this Fekkai spray for years!
I’m not particularly picky when it comes to hairspray… I like something with a light-medium hold that isn’t sticky at all! (Okay, maybe a tiny bit picky.) This Tresemme drugstore buy, this R+Co spray, and this Oribe spray are probably my favorites!
I always finish styling my hair with a tiny dollop of this glossing creme on the ends to keep them shiny, soft, and add a little bit of moisture back in!
Okay, let’s get to it!

I curl my hair in three sections… I clip up the entire top half of my hair (from the ears up!) and start curling the bottom section first. But before I get started with each section, I blast it with a dry texture spray. For freshly washed hair, this helps create a little bit of grit to help hold the curls!
You’ll see later on, but I leave all of the hair in front of my ears until the very end. So on the bottom section, I start with a one-inch section just behind my ear. Make sense?

The trick is to keep the section of hair completely flat as you wrap it around the curling wand! If you twist the piece of hair as you curl it, your curl will come out much differently.
Another tip that’s super important… Always wrap the hair around the wand the exact same number of times! I wrap mine three times with the current length. You’ll notice that I start with the wand closer to my head, wrap the hair around three times (while staying flat against the wand), and then slide the wand down the section so the three curls land closer to the ends. Make sense? The GIF below shows this pretty well!
I always hold the ends off of the wand for that slightly un-done look. And let’s be honest, I’m too lazy to use the heat protectant glove that comes with the wand so I can’t get too close anyhow. 😂

When I’m removing the wand from the curl, I let go of the end and lightly pull the wand straight up so the curl falls straight down. I don’t touch any of the curls until I’m done with the bottom section on both sides.


Another trick of mine… Always curl away from your face! I can’t say this enough. I actually have started experimenting with going back and forth direction-wise, and I do like the outcome, but it’s not the same as these everyday loose curls that I usually have!

See how I’m going towards the back on this side?

Finish your curls for the entire bottom section and then let out half of what is clipped up. Don’t forget to spray this new straight section with dry texture spray!
Also, if your hair doesn’t hold a curl very well at all, I would spritz a teeny bit of hairspray on the bottom section of curls before you move on. Sometimes I do, sometimes I don’t. Usually just depends on the cleanliness of my hair! (Dirty hair typically holds a curl better.)

Spritz your dry texture spray and basically do what you did on the bottom section.
Curl away from your face and leave the pieces in front of your ears for last!


Once you’ve got the middle section done, let your top layer down from the clip. Give this layer a quick spray with the dry texture spray, too.

Start behind your ears and repeat what we’ve been doing! Curl away from your face, but leave the front pieces until the end.


Alright, now everything is curling except the front! It should look a little something like this…

I go from back to front here, I usually have two sections on each side that need curled… This little pain-in-the-ass section right in front of my ear is usually messed up from being tucked behind my ears.

It’s kind of wide and hard to curl, but I make sure to wrap it 2-3 times. When it comes to the top layer, I wrap the curls two to three times, depending on the length. If my layers have been cut recently, usually just twice. But I try to still wrap the pieces in the back a solid three times. You don’t want your curls starting too high though, so only wrap twice if your strands are shorter on the top layer!
(Also, sidenote: When my hair has been super long, I used to always wrap it around four times. It just depends on what you’ve got going on!)

When it comes to the frontmost piece on each side, I only wrap it twice. I slide the wand down the section so the curls start at my cheekbone!

And then the other side… The ear piece first.

And then the front piece just curled around twice!

And that’s it, you guys! It’s SO EASY. Usually takes me about 15 minutes!
And now to finish them off…

Spray down your curls with hairspray! I prefer a light-to-medium hold that is in no way sticky AT ALL. I want my curls to last, but I also like when they fall a little bit. And I never want them to feel stiff to the touch or anything like that!
This Tresemme drugstore buy, this R+Co spray, and this Oribe spray are my favorite hairsprays that do just that!

Another trick… Spray dry shampoo spray into your roots to make your whole do last longer! Stop the oil before it starts, you know?

I apply just below my part, underneath the top section of my hair. And then again close to my ears and at the back of my neck!


Give it a good rub-in!


Then for the styling cream…. Apply a little bit into your palms and then gently and lightly toss your hands through the lengths of your hair. Make sure there’s not much leftover on your hands and tame any flyaways near the top!

And now for my final trick…
My favorite way to extend the life of my wash is to put this dry shampoo powder in at night before I go to bed. (Sprinkle a little bit in your hands, rub your hands together (over the sink), and then massage your scalp/roots, just as if you were sudsing up your hair with regular shampoo. Repeat quite a few times!) It soaks everything up overnight and you wake up with hair that doesn’t look like it needs to be washed! If I need a little extra volume, I spray in dry shampoo spray at the roots in the morning to perk up my strands. I currently have this spray, this spray, and this spray and I love them all!
Most of the time, I’ll be able to sleep on my curls and wake up with hair that’s ready to go! In fact, I usually like my loose curls better the day after I do them. If you have a few stray pieces, you can always use your wand to give them a bit of life. A little texture spray or dry shampoo spray always help to perk up your roots!
I think that’s it, you guys! What did I miss? Comment below with any questions and I’ll be sure to get back to you right away.
xo






Thanks for the tuturial! Hopefully now I will be able to do this with my hair, too 🙂
xx from Bavaria/Germany, Rena
http://www.dressedwithsoul.com
Thanks Rena! Let me know if you come across any questions when you try it. If I can do it, you can do it! SO easy. 🙂
Love this tutorial. I have the hardest time with the hair wand, so I’m excited to follow your step-by-step photo instructions. Super helpful!
Thanks so much, Elizabeth! Let me know once you try it out and if you have any questions… Hoping I didn’t miss anything!
Love that you did this tutorial! So cute! I hear that hair dryers are a good investment and make the difference between night and day, and I’ve been seeing the T3 ones everywhere! Think I finally need to give it a try!
Lauren
http://oliverstwistblog.com
They really do! When I’m blow drying my hair at the gym with their dryers, I always notice how much longer it takes. LMK what you think if you get one! xx
I love the little gifs you created for this, so cute and so different from still frames and even a video…I can’t wait for a video though!
xx!
Taylor | http://www.styleiseverythingblog.com
Thanks Taylor! Video tutorials seem like such a big hurdle, but I know I just need to do it. Stay tuned!
Thanks! Do you know if this wand is dual voltage? I’m looking for a wand to take to the UAE and Europe next month but always worried blowing them up!
Hi Dana! I don’t specifically know if it’s dual voltage or not (maybe tweet the Jose Eber Hair account?) .. BUT I do know that I’ve used it in London, Paris, Italy, Amsterdam, Iceland, Japan, and Hong Kong and it’s still going strong! 🙂
I’ve been looking for a tutorial just like this! Thanks so much! I can never get the curls right and my hair is long and thick! I am going to try this technique next time!
Glad to hear! I think the trick is keeping the section flat against the barrel. Let me know if you have any questions once you try it out! xx
great post Jess. Maybe if I had read this before trying out your curling iron I wouldn’t have broken it. #fail
Hahahaha oh well! I’m laughing out loud right now remembering you coming into our bathroom like “uhhhh… Jess?!” It somehow still worked after that, I just had to use tweezers to turn it on. Broken curling wands aside, we should plan another getaway sometime this year!
such a cute post! xo
http://www.dearserendipity.com/
Thanks for the pictures and products. I already do all of this, except I CANNOT seem to keep the hair flat on the barrel, it is always twisted! I like the curls I get though, but would love to get your curls as well. Thoughts?
It’s all about keeping the hair flat on the barrel. My advice would be to practice doing it when your curling iron is unplugged. Might be easier to get the hang of it if you’re not worried about getting burnt!
Good tutorial The best thing I have used is my Karmin.